How To Set Up Zoho Mail with a Custom Domain for your Website/Business
INTRODUCTION
By the end of this tutorial,
You will have know from A-Z on how to set up your own Professional Business email with Zoho.
But First why Business email??

Benefits of a professional email address
- …….Increase Professional Perception
- Build Your Business Credibility
- Builds trust……
- Backup and contingency strategies service in case the server goes down gets hacked or simply closes its doors
- ………….It keeps you out of spam filters
- Wins Customer Trust
An Example is that When you send an email to someone with a Gmail account ([email protected]) and another one with your own custom domain email ([email protected]),
The email sent with your custom domain name looks more professional and will have more impact on it than the one sent with a Gmail account.
Now that we know some of the importance of having your own Custom domain professional email……
……Let’s get started
So how do you set up your own professional email with your domain name?
I am gonna walk you through from A-Z on how to set up Zoho mail
Its easy as 123……
There are some ways to get a professional email with your custom domain name, But I personally use and recommend Zoho mail
Why is Zoho Mail The Preferred One?
Cause mail services for custom domains typically come with a fee, but Zoho offers a free mail service for up to 10 users on a single custom domain.
Requirement
You should own the domain name that you want to use as your mail domain.
You should have access to the Cpanel of your Hosting Account
Let’s get into it
Just follow these steps and you should be good to go-
Step 1 – Go to Zoho.com (Click Here)
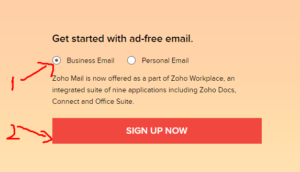
Make sure you select Business email and click Sign up now
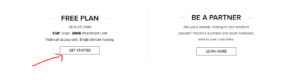
Step 2- You will be taken to the Zoho pricing page
Just scroll down until you see the Free plan
Select Get Started
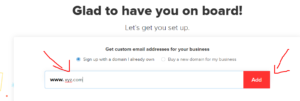
Step 3- Input your Domain and click Add
Step 4– Add you Information
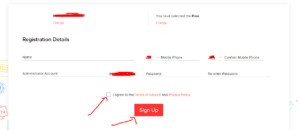
Note: In the administrator input the title/name you want to use. Example- [email protected] /[email protected] /[email protected]
Step 5- They will ask you about your details like phone number and verification code and all those stuff.
I hope you can manage that
Step 6- It will bring you to the Domain set up / verification Dashboard
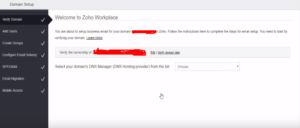
Now you have to verify that you own the Domain name
So just click on the choose button and select your Hosting provider
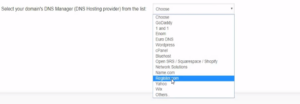
Note: If your Hosting provider is Hostgator use Cpanel. Choose Your respective Hosting Provider
If you buy your Domain name from Godaddy and host your site on another hosting provider, you have to select the Hosting Provider and not the Domain name registrar site
Example- If you Buy xyz.com from Godaddy but you host your website on Hostgator choose Cpanel
At the same time if you buy your Domain name from Godaddy and also Host on Godaddy just choose Godaddy from the drop-down menu.
Basically, it’s just choosing your hosting site.
It works Just the same for all of them
Now that is cleared out of the way let continue
In my case, I will go with Godaddy
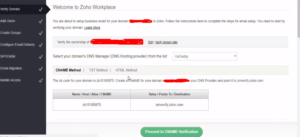
Step 7- Now the next step is for you to add these codes to your Hosting provider
If for some reason you don’t know to add CNAME records here is a Tutorial ( CLICK HERE )
Step 8- After you add the CNAME just click Proceed to CNAME verification and click VERIFY NOW
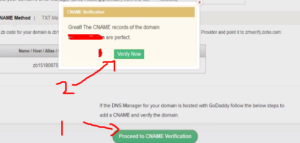
Sometimes it takes around 1 hr to show Success
Don’t panic it’s perfectly fine
Your TTL is long for some by default
Step 9- It will bring you to this page for one last chance to make sure
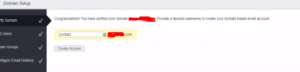
or if you want to change the administrator name as we have discussed in Step 4.
Click Create Account
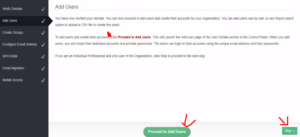
Step 10- Next is the Add users tab
If you want to add users then just click add users
It pretty simple but if you are one man just click Skip
Step 11- Its the same as the step 9
If you want to create a group
Just click Skip if you don’t want.
Step 12- In the email configure tab, You have to add the MX records to your hosting provider
Mx records allow us to send and receive email on your professional website
It’s just the same as before when you add the CNAME Record
Go ahead and input the MX records
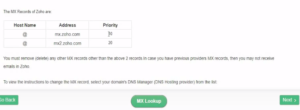
Like before it takes some to show the MX records according to your Hosting Provider and TTL you set. So don’t panic
Wait for some time
OK next Click MX lookup
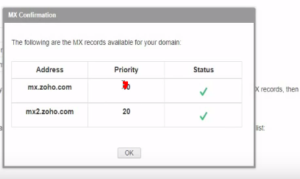
If it looks like this that means you are still on the track
Step 13- Add the TXT records to your Hosting provider

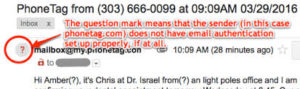
Because if you don’t the email you sent to others will look like this
It will have a Red question mark
So make sure you add the TXT record
Like before this also may take some time
Step 14- If you want to migrate your email list you can select other than that just click Skip
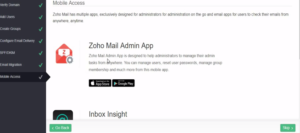
Step 15- In the Mobile access tab they will show you about Zoho app for mobile devices
You can just click Skip Or If you want mobile access, you can just go to app store and download it
Step 16- Go to Zoho workplace
You will be directed to your professional email inbox where they will show you some tutorials and that’s pretty much it.
Now you Have your professional business email
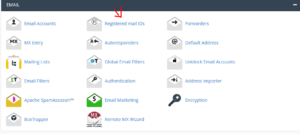
Next, go to your CPanel
Under the tab Email << Go to Registered email IDs
Next, Enter your Email id from Zoho you just get and enter submit
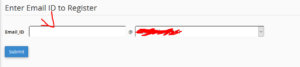
You are all set and done
Oh, wait!
In case you are wondering how will my display name be when I sent someone an email
Will it be your name or XYZ or whatever
We got you
Just CLICK HERE
You will be greeted with a page like
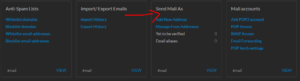
Click on the Send mail as and Hover down your Primary email where you will see the edit pen icon

And there you go
Now You have your own professional business email.
CONCLUSION
Thanks for reading till the end, It means a lot to me
I really hope this helps
if you have some problems Leave a comment and let’s sort out together
If you like it then please share it and let other’s know about it